Go Live on Facebook with Zoom

While Facebook no longer supports the Dual Broadcast feature, don't worry! There's still a way for you to interview your influencers, friends, and experts - Zoom. In this article, we'll be going over how to broadcast Live on Facebook using this fantastic tool.
Scheduling a Webinar on Zoom
**Note: Because Zoom is consistently updated, the interface may look slightly different. However, the options and sequences will remain the same.**
Zoom is an easy-to-use video conferencing tool with better sound and picture quality than many other similar platforms. Zoom also offers the ability to go Live on YouTube and Facebook.
1: Sign up for a Zoom Account
So, first things first: in order to go Live on Facebook with Zoom, you'll need a Zoom account and plan. While Zoom does offer three paid plans, they also have a basic, free version as well. You can also request a demo to figure out the right fit for your business.
2: Schedule a Webinar
Now that you've picked a plan and signed up for an account with Zoom, you can schedule a webinar. Depending on which plan you chose, you may need to add the webinar feature (which you can do here).

3: Choose a Title
For your title, you'll want to choose something interesting - something that will entice people to click on it.
4: Description
Unless you are running this as an actual webinar, you don't need to worry about filling out the description. However, if you choose to double stream (where you will have people on Zoom with you and are also streaming to Facebook), you can go ahead and input a description. The more detailed your description is, the better off you'll be. You'll want to make your description interesting, so people feel the need to click on the video to learn more.
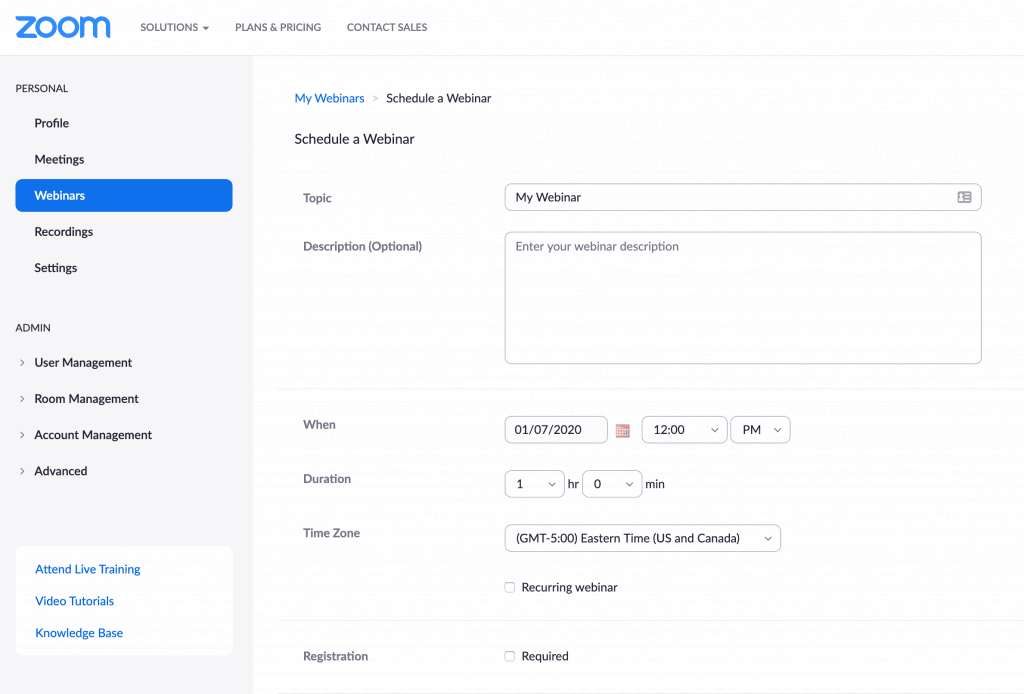
5: Determine Your Logistical Elements
Once you've decided on your title and description (optional), you'll want to set up your logistical details.
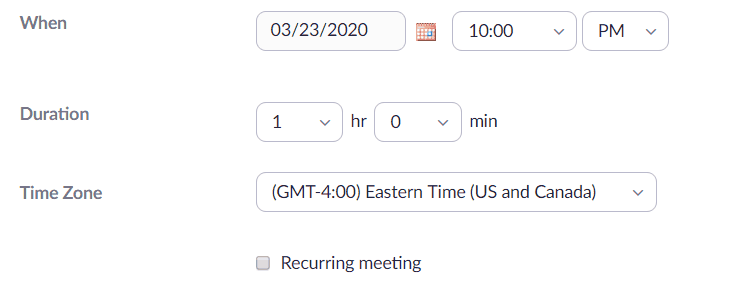
- When: Choose the date and time you want your webinar / interview to take place.
- Duration: Choose how long the webinar / interview will last.
- Time Zone: Choose what the time zone is going to be.
- Video: Here you can choose whether or not you want the video option to be activated for both you and your panelists. Depending on the plan you chose, you can have up to 1,000 participants. The Basic Plan (free) allows you to have up to 100 participants.

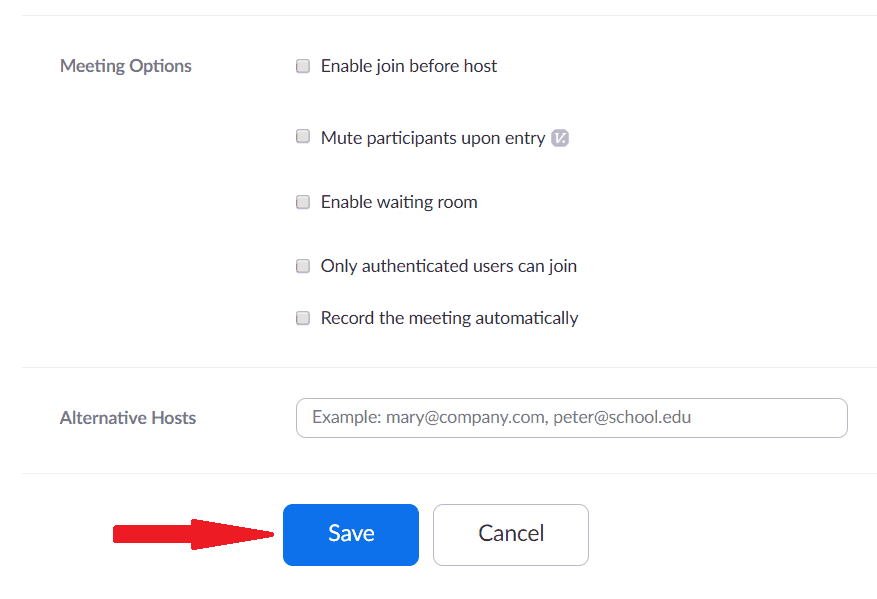
- Other Webinar Options: Check out each of the other options and figure out which ones you want to use. Remember to record your sessions.
- Save!
6: Invite Your Guests
Now that you've scheduled your webinar, you can invite guests. This is optional - you don't have to worry about this step if your main goal is only to Live stream on Facebook of YouTube.
To invite panelists:
- Click on the "Invite Panelists" tab, then click on "Edit."
- Add their name and email address.
- Check the box for "Send invitation email to panelists immediately."
- Click "Save."
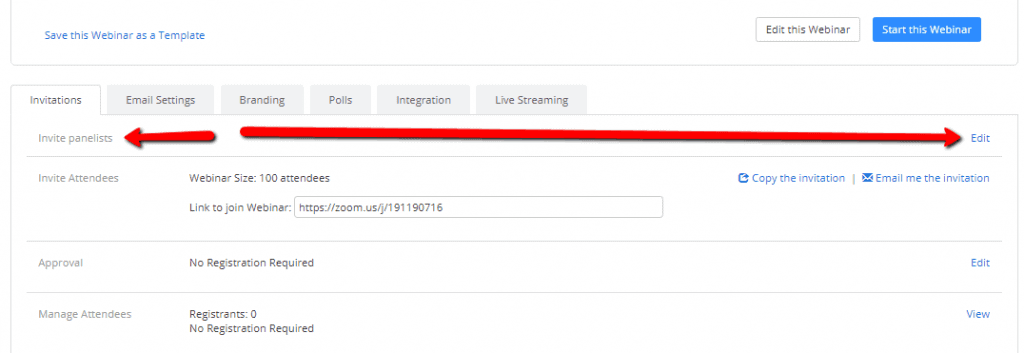
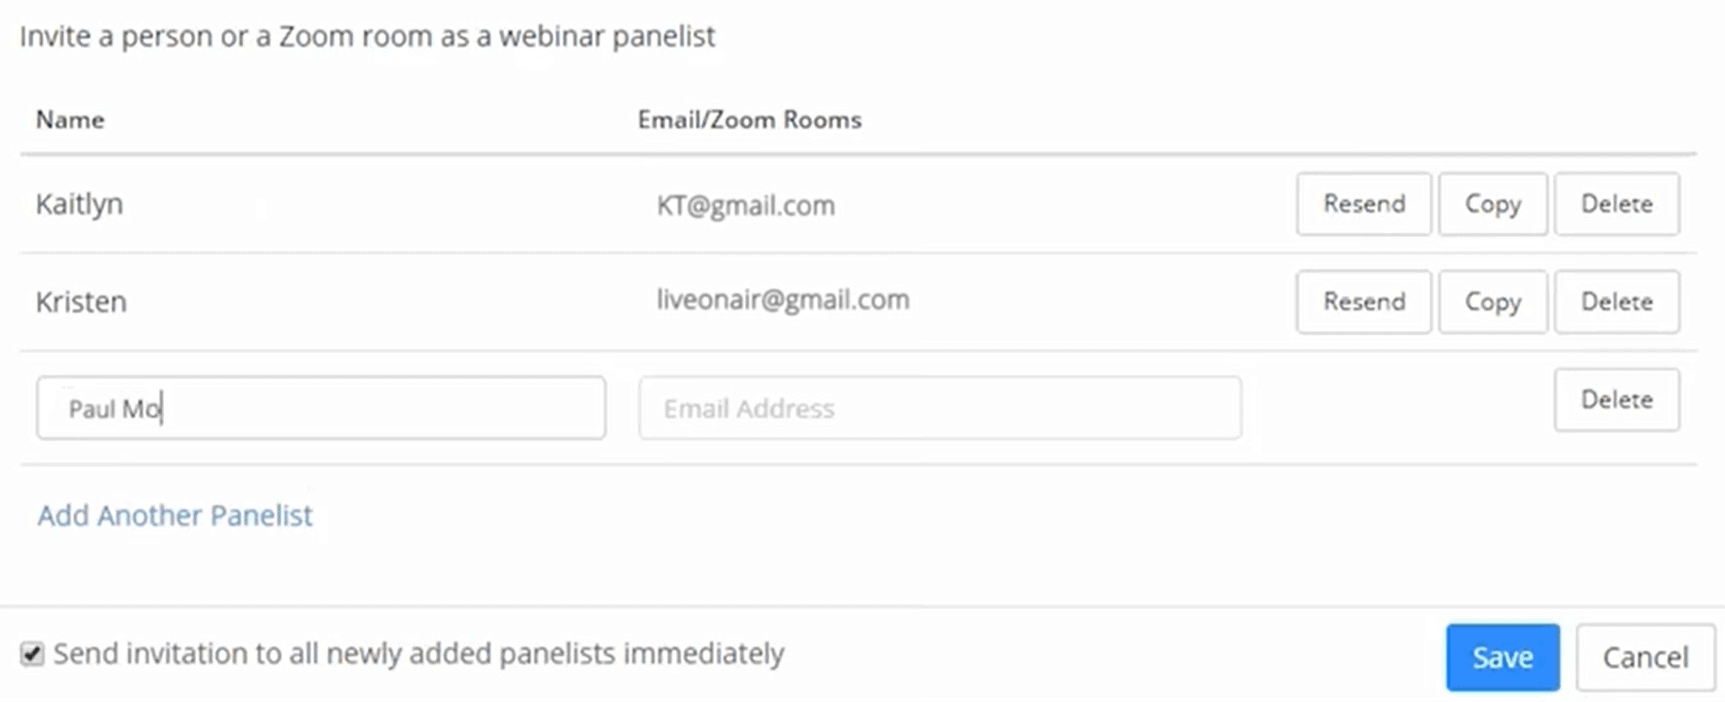
You can also just choose to share the "webinar for everyone" link. Once your guest is on, they can be promoted to panelist.

Please Note! When inviting an attendee to a Zoom call, they DO NOT need to have an account. They can simply follow the invitation link you've sent to them. However, in order to ensure the best results, they should download the app beforehand. They still won't need to create an account; downloading the app ahead of time will just speed up the process.
7: "Start the Webinar"
Once you have everything ready to go, you can click the blue "Start the Webinar" button.
At the beginning of webinars, your mic is always muted, so don't forget to unmute it before speaking! You also have the option to "mute your face," which means you can stop your video if you want to.
You'll have access to a cool "Share Screen" feature as well. When you click on this option, you're able to share whatever you want with your viewers, and your own video will show up in the corner.
Another option you can choose is how you and other presenters will be seen. For example: if you have a panelist on your webinar, you can select between gallery view and speaker view.
Gallery View shows both presenters beside each other.
Speaker View shows you whoever is talking.
Go Live on Facebook!
Now that you've done all that, you can go Live on Facebook!
- Along the bottom bar, you'll see a "… More" button. Click on this.
- Click on the "Live on Facebook" option. (You will need to have an upgrade of the Zoom Webinar solution in order to have access to this option.)
- Your default browser will open. If you aren't already logged in, you'll be prompted to log into Facebook.
- Choose where you'd like to post. You can either share to your timeline, in a group, or in an event.
- Click "Next."
- If you are unable to start the live stream, clear your browser's cookies and cache, then try again.
- Click on the blue "Go Live" button in the bottom right-hand corner.
- You'll see a notification from the Zoom client that your webinar is now Live on Facebook. You can now start your webinar!
When you're ready to stop streaming, you can either end the webinar or click the "Stop Streaming" icon on the Zoom client. Congratulations on holding your first Live Webinar using Zoom!
Let's bring the spotlight to your business today.
From brainstorming to implementation, AnoLogix has successfully designed, created, developed and implemented websites for people and businesses since 2000.
With AnoLogix your business can skyrocket. Do you want to learn how we can help?
or call us for a FREE consultation at (904) 807-8961