
A Guide to Optimizing
and Serving Scaled Images

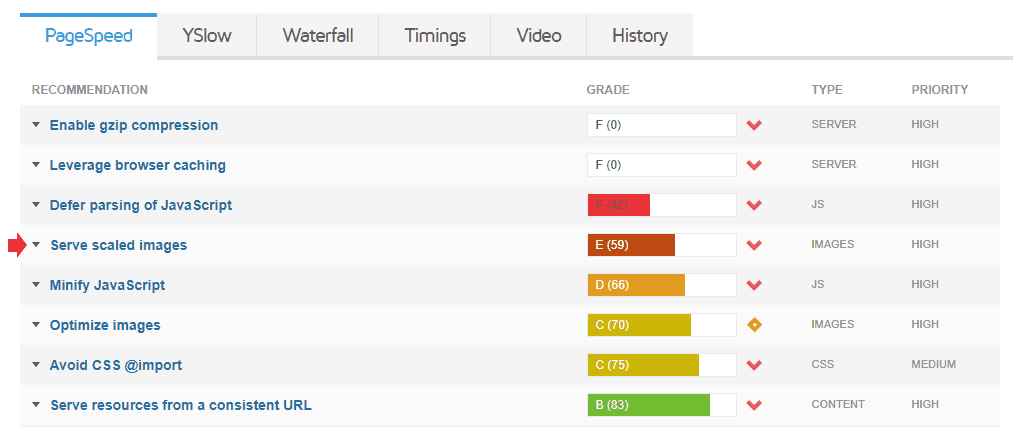
Serving scaled images is a great way to improve your website’s
performance, yet it is often overlooked. In this guide, we will go over what a
scaled image is, the benefits of serving scaled images, and how to serve them
in WordPress.
What exactly is a
scaled image?
Images should be a top priority if you’re looking to improve
page speed, conversions, and sales since they can use up a lot of file space if
they’re oversized. Images on the web have to be just the right size, not too
big and not too small. If the image is too small and is scaled up, it will
become blurry and unattractive. If the image is too big, the browser will
shrink it so that it is the right size, and while this doesn’t affect how the
image looks, it will add to the file size of the page.

While you can’t see a change in quality for images scaled
down by the browser, there is extra weight on the image files which can be easy
to overlook. However, serving an image that is too large can be hurtful. For
example, when an image is too large, it forces the browser to perform
additional server requests. So, rather than delivering a webpage as fast as
possible, the browser has to take the time to resize the image, especially on
image-heavy webpages.
For example, if you upload a picture with the dimensions of
500 x 500 and use it as a thumbnail of 50 x 50 using HTML or CSS, the browser
will first have to download the large file and scale it down before displaying
it. It would be more efficient to resize the image to 50 x 50 so that the browser
doesn’t need to take the time to download and resize the image.
A scaled image is
an image that has been resized for the exact dimensions you need. Scaling will
preserve the image dimensions, rather than alter the proportions (like
cropping).
What are the benefits
of serving scaled images?
When an image is properly scaled, it can improve the
performance of your website on computers, smartphones, and tablets, as well as
save you lots of data. Because scaled images take up less space, they will load
a lot faster and reduce the amount of resources used.
Serving scaled images is recommended for website
optimization. The better your score is, the better your SEO, and the higher your
website’s ranking on Google will be.
How to Serve Scaled
Images
Step 1 – Detecting the incorrectly sized images
- Go to Google PageSpeed
Insights - Enter your webpage URL
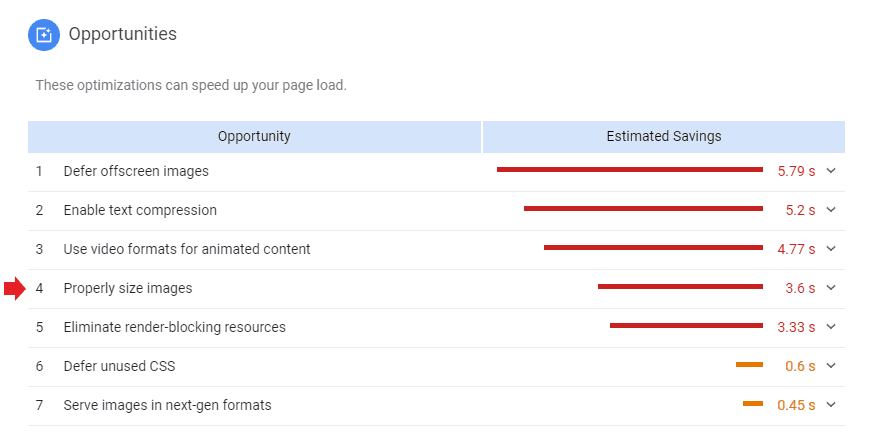
- If you have any improperly sized images, you can
click on the dropdown next to “properly size images.” This will give you the
links to the images that need resizing.
Step 2 – Inspecting your images
Once you know which images need to be optimized, you can head
back to your site in Google Chrome.
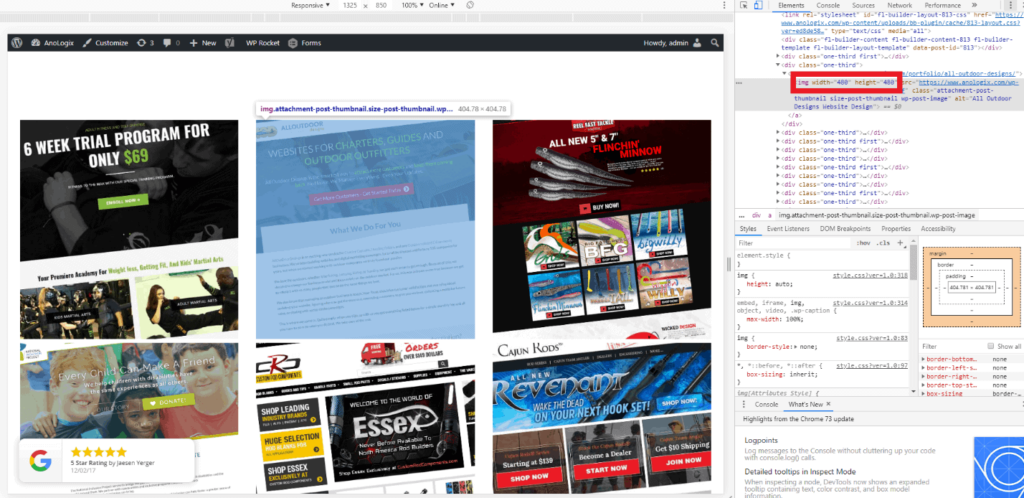
Right click on the image and choose Inspect.

When hovering over an image in the inspector, a container size will pop up for the image.
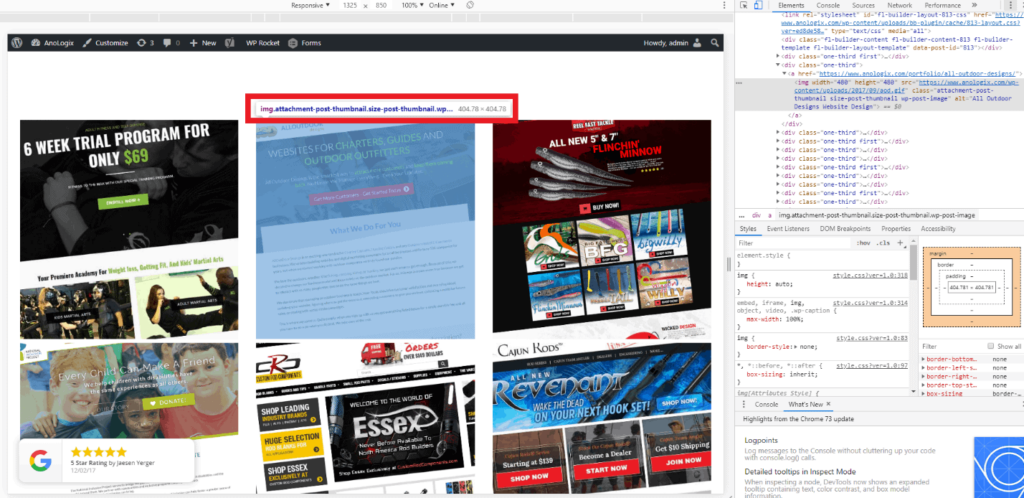
Resize your image in WordPress and re-upload (see Step 3).
Step 3 – Resizing your images
Manually Crop Images in the Media Library
- Go to Media > Library
- Click on the image you want to crop
- Click Edit Image to open the editing interface
- Scale or crop the image as needed
Depending on the original image’s dimensions, keep in mind
that if you scale the image to the width you need, the length may be shorter or
longer than what is specified by the theme you’re using.
Choosing to scale
your image means that it will still retain the proper proportions relative to
the original image. If you choose to crop
your image, it may not end up being proportionate depending on the dimensions
chosen.
Scale your image
by inputting the desired width and height and then clicking the Scale button.
If you want to crop your image instead, you can click and drag your mouse over the
image and select the area you want visible, or enter the desired aspect ratio
(this is the relationship between the width and the height). If you want to
preserve the aspect ratio, you can do so by holding down the shift key while
resizing your selection.
You can also click and drag the area you have selected to
move it to the part of the image you want visible. If you decided to crop your
image by selecting an area with your mouse, click on the crop icon above it when you’re done.
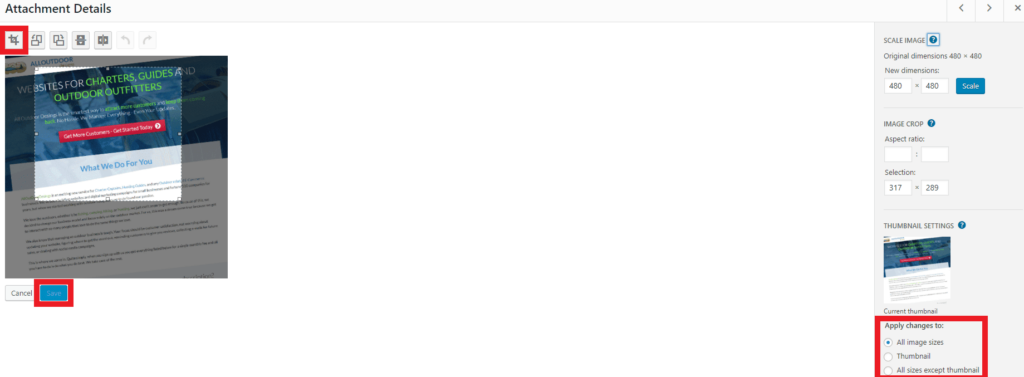
After you are done with that, under Thumbnail Settings, choose what you’d like your changes to apply
to. When you’re done making changes, click on the Save button.
You can also resize your images while editing a post or a
page by clicking the Add Media button
above the editor. Click the Media Library
tab and choose from the listed images. Click on the Edit Image link to access the same editing interface as seen above.

Media Settings
The default image sizes in WordPress are thumbnail, small,
medium, large, and full-size. However, full-size refers to the original
dimensions of the uploaded images and cannot be changed under Media Settings.
To resize the default image sizes, go to Settings > Media and enter the width and height for the image size you want to change. When you’re done, click Save Changes.
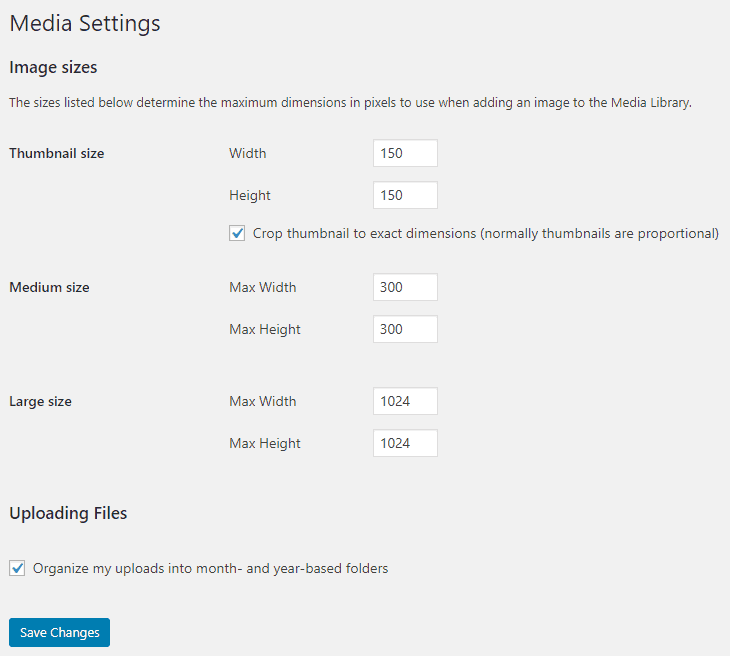
Please keep in mind that these sizes can be used in numerous
places in your theme, so you may end up editing some images that you don’t want
resized.
Edit Images in Paint
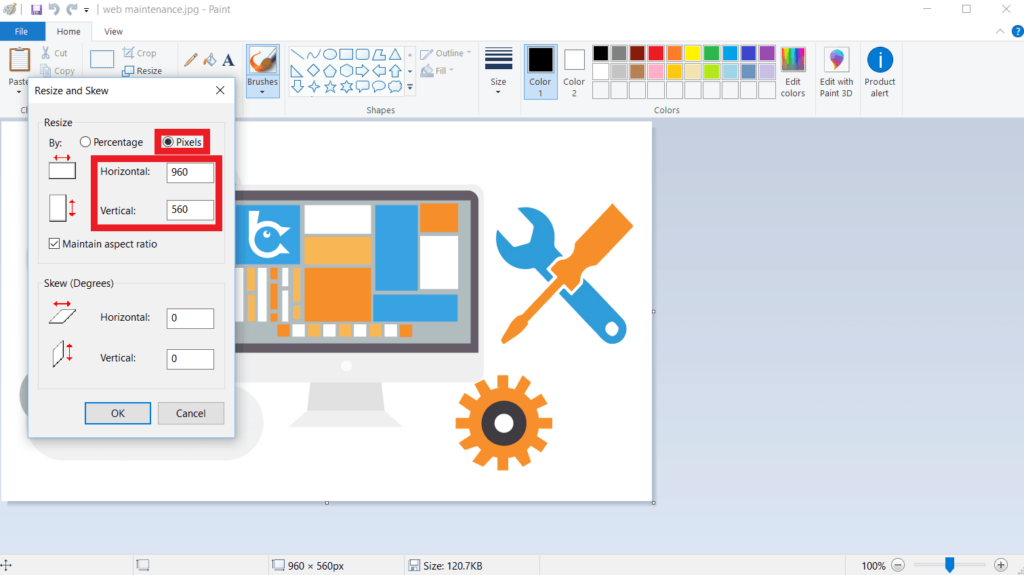
- Once you’ve opened up Paint, click on Resize under the Home tab
- A popup box will allow you to enter in the new
desired dimensions - Select the Pixels
radio button and edit the horizontal dimensions. The vertical dimensions will
be resized automatically if the Maintain
aspect ratio box is checked (which is what we want) - Once you’re happy with your adjustments, click OK
- Save the file in Paint
- Upload the new image to WordPress and replace the
old one
Conclusion
In this guide, we’ve gone over what scaled images are, the
benefits of using scaled images, and how to serve scaled images. Not only will
serving scaled images decrease the loading times for your webpages, but it will
also help you rank higher on search engines.
While no formal knowledge is needed to serve scaled images,
if you need help with or have any questions about image optimization, please
feel free to reach out to us!
FREE Guide
The 5 Essentials For Keeping Your Website Safe
